
Installing Sharp Photocopier Drivers
Installing Sharp Photocopier Drivers
Installing the driver for your Sharp Photocopier is easier than ever. Below we have instructions on how to do so on your Windows PC, you can download your Sharp photocopier driver here.
Step 1. Determine what operating system you have
Control Panel > System (or search "System" in your control panel)
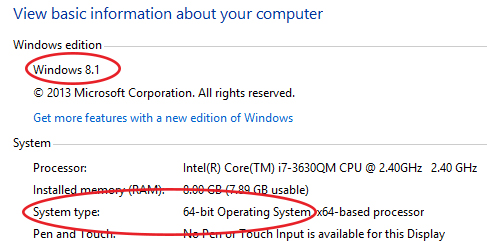
Take note of what edition of Windows you are running Eg. Windows XP, Windows 7, Windows 8, etc.
Also take note of the System type, if it is 64bit or 32bit.
Step 2. Download the Driver
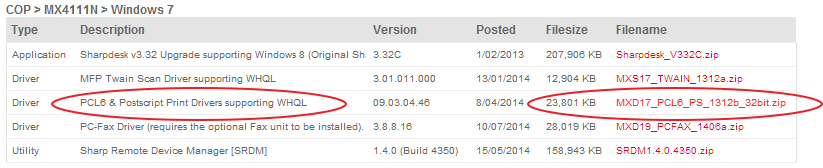
01. Search for your model on the Sharp Drivers page
02. Select your version of Windows (remember if you are running 64bit to select the 64bit option, if you are running 32bit, select the plain option)
03. A list will load, similar to the image below.
04. Choose the PCL6/Postscript option, click the .zip file on the right to download
Step 3. Installing the Driver
01. Find the [Setup.EXE] and launch
02. Choose [Standard Installation] The setup will then scan your network, locate the photocopier and install. You may have to select your photocopier from the list
Step 4. Configuration
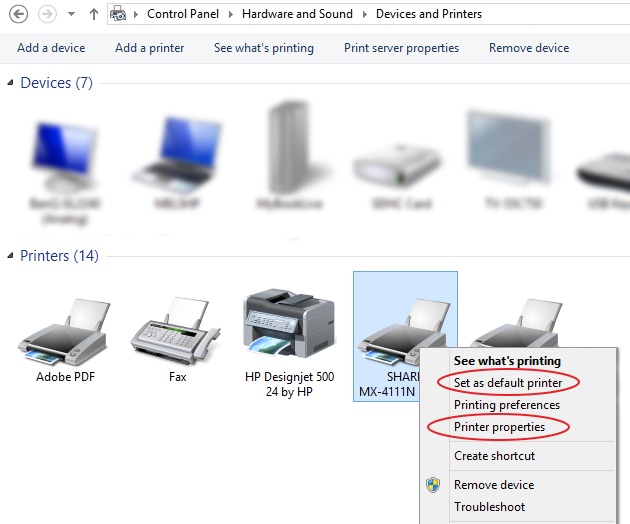
01. Go to your [Devices and Printers] in your [Control Panel]
02. You can right-click on your device and [Set as Default Printer]
03. Right-click your device again and select [Printer Properties]
01. Click on the [Configuration] tab, click [Auto Configure]
02. Move to [Advanced] tab, click [Printing Defaults]
03. (optional) Tick [Black and White Print] box at the bottom (will set default printing to black and white)
04. (optional) If you use account codes move to the [Job Handling] tab, check the [User Number] box and enter your code, apply.


